 Posted by hacking tips in

Introduction
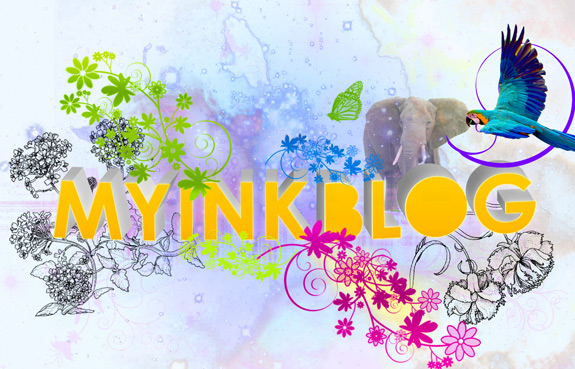
In this tutorial I will show you how to create a lovely floral style 3D text effect using only Photoshop and Illustrator. The idea is to add the elements we like while keeping the design subtle, pleasing to the eye, and having some fun along the way.We’ll be using Illustrator for the 3D effect because it’s more user friendly than other 3D programs like 3ds Max, and it can do an equally good job for what we require.
Resources
If you’re following along, you’ll want to grab these resources.- Levenim MT Bold
- Flower Pack
- Nebula 1
- Nebula 2
- Nebula 3
- Elephant
- Flowersn’swirls
- Parrot
- Butterfly Brushes III
Step 1
To start, create a new document sized at 1200 x 770, and fill the canvas with a radial gradient that goes from #a1dbff to #f0f9ff, transitioning from dark in the center to light at the edges.
Step 2
Download this font, Levenim MT Bold. Load the font, then open up Illustrator, and type out ‘MYINKBLOG’.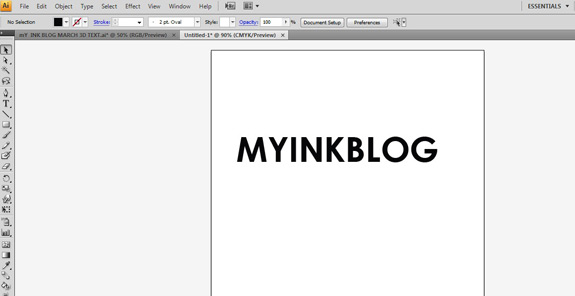
Step 3
In Illustrator, select the text and choose effect 3D, extrude and bevel. Proceed by choosing the settings shown below. At this stage it is a good idea to play with the different 3D settings and see what results you like, but for now the following are a good selection.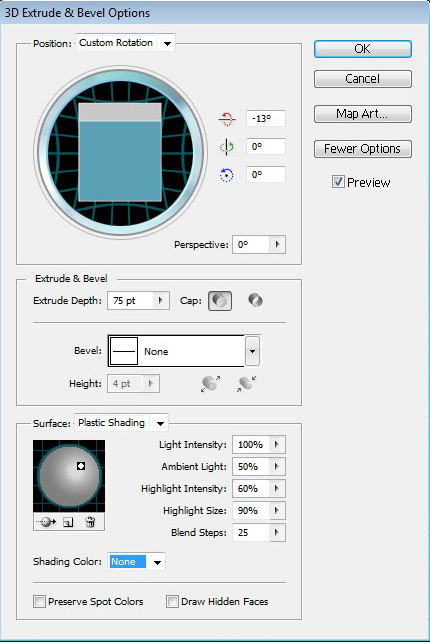
Step 4
Copy and paste the text into your Photoshop document as a smart object, this allows you to resize the text as much as you like without losing quality.
Step 5
The next step is my favorite part, we need to cut out the faces of the letters with the pen tool. Make sure you save your path, and cut out the letters on the same work path too. Now select the faces of the letters, inverse the selection, and fill them with a gradient from #ffd24e to #ecb207, leave the gradient defaults as they are. Finally, add a stroke of yellow set to 2 pixels and an opacity of 38%. These will blend in subtly with the addition of other elements.
Step 6
Select the text , Ctrl + Shift + D should reselect it, fill with any color and reduce the fill to zero. Then, add an outer glow set to white with the settings shown below. This will add a nice glow to the edges of the text, subtly increasing the overall energy.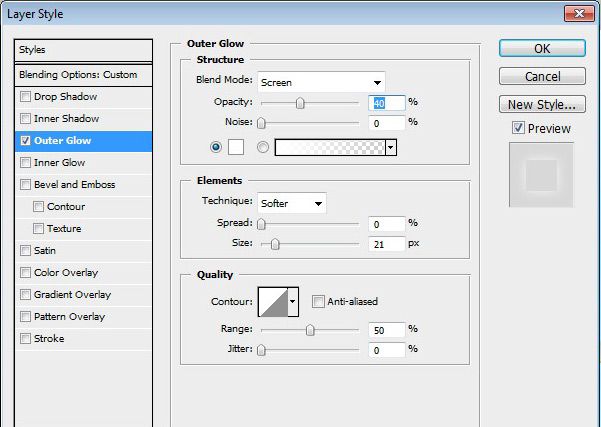
Step 7
Download this flower pack, I used 7 on the right, and 8 on the left. Arrange them to face upwards on one side and down on the other, so they balance each other. Change the blend mode to multiply to eliminate the white areas.
Step 8
Next download nebula 1, 2 and 3. Place them into your document and change the blend mode to either hard light or screen and lower the opacity to around 30%. As you can see it’s a delicate effect. If it needs further reducing, add a layer mask and brush over areas so the whole image blends in better.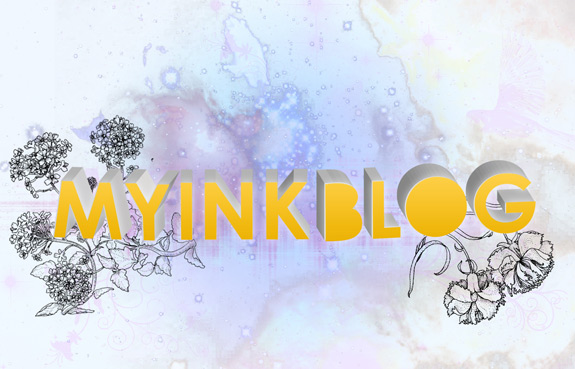
Step 9
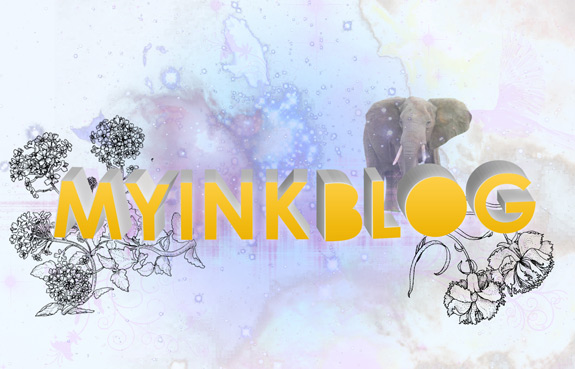
Download this image of an elephant, and extract it. Place the extracted elephant in the image, underneath the nebula, and the text layers. Reduce the size to approximately twice the height of the letters.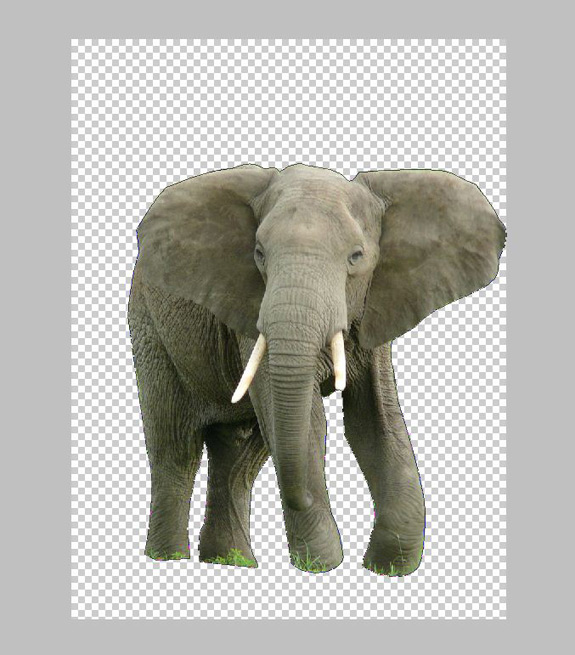
Step 10
Now, for the flowery part download these amazing brushes. Using the first brush in the pack make a shape on the top left hand side. Here we can see the composition really beginning to take effect, keeping the design simple and refined.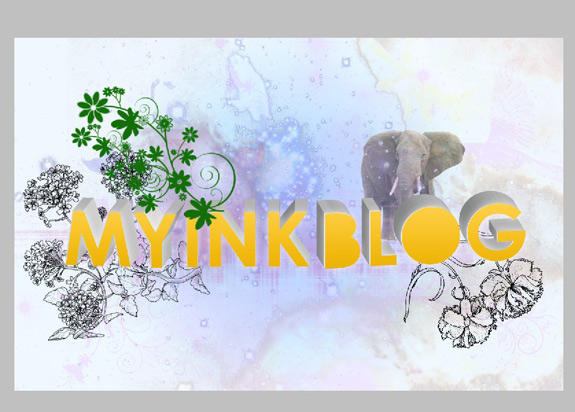
Step 11
Now, we’ll add a gradient overlay. Double click the layer to get to the layer styles, and use a light pastel green gradient. We use a layer style because it’s a lot easier to change at a later stage.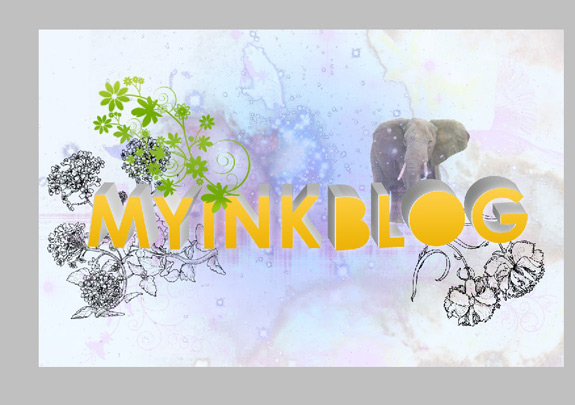
Step 12
Continue adding floral elements until you are pleased with the look, just remember less really is more, and subtle is more effective than having too many patterns. The gradients and the positioning of the flowers give the peaceful sense of movement.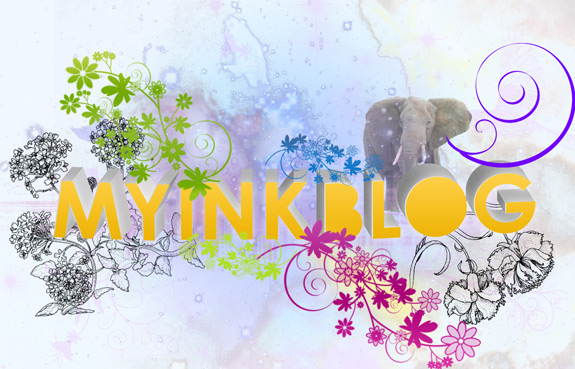
Step 13
Download this image of a parrot. Then extract it using your favorite extraction method and paste it into the composition. Next, add some adjustment layers with the follow settings.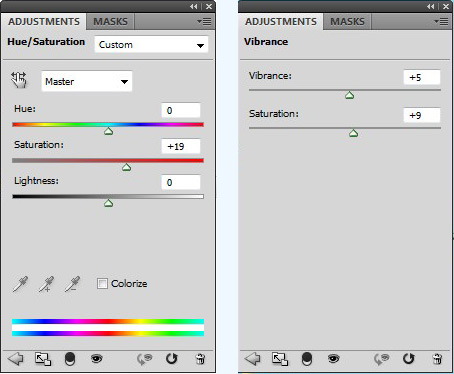
Step 14
Add a butterfly or two with these brushes. You can continue to add additional butterflies, or other creatures, just be sure to keep it simple.Step 15
Add another layer, select the text, and add an outer glow with the following settings, remember to reduce the fill to “0″.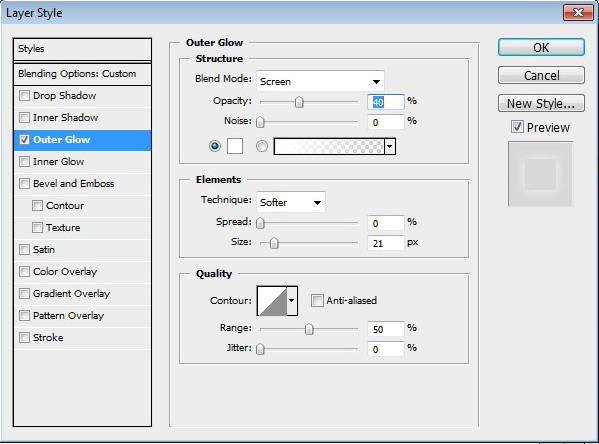


blog comments powered by Disqus